Saturday, August 23, 2014

Sausage Potato Casserole

Tonight was Sausage and Potato Casserole night. I know what you are thinking, delicious right? Well we made it once before and I remember it fondly, so it probably was. We planned the weekly meals and thought it could be good enough to do again. Don’t know if this is a repeat, and apologize if it is. Anyway, as the end of the week rolls around, Aly remembers she is going out to stay with friends this weekend. So I’m alone. Now normally when alone, I usually just eat whatever we have laying around. Bag of peanuts, pound of carrots, baking chocolate. Whatever. For whatever reason today though, I think because we had bought the ingredients, I decided I'd make the meal anyway. So I apologize now for the pictures, Aly normally does those.

First and foremost, I have no memory of where we found the recipe below. If someone links it we would be glad to repost. I do have some feedback though. 5 Large Potatoes is bull. If someone buys that for this recipe laugh at them. Go with 3 tops. Other than that, its pretty easy. Dice, mix up, bake.

I started by lining the pan with aluminum and then coating in olive oil. I like that this recipe doesn't measure anything, which makes me think maybe I made it up? Anyway, I put some in the pan. Then you get a bowl, dice the sausage onion and 5 large potatoes and throw them in. As you can see my bowl was not big enough. I think I was supposed to skin the potatoes, but as Aly was out I skipped that step. I like the skins on and figure it can't hurt. It was way more potato that needed, and I probably threw a whole one’s worth away at the end. It still piled super high.


Note about sausage. I'd have preferred one that wasn't shrink wrapped, because that sort of meat generally skeeves me out, but our Wegmans refuses to carry anything that isn't pre cooked and pre seasoned. I think they really focus on the “Heat it in a pan and call it cooking” crowd. So this is the one they had.

I put it on bake for an hour, wrote this entry and then threw cheese on. Back in for 5 mins, and then ate. Its pretty solid and I'll have leftovers for the whole weekend.

-Jeff

Note from Aly: I originally found this recipe on Boy Meets Bowl. Jeff did not make it up.
Ingredients:
-1 Pkg Smoked sausage
-1 Large onion
-5 Large potatoes
-Olive Oil
-Paprika
-Dried thyme
-Grated Cheddar cheese

Directions:
-Preheat oven to 400 degrees. Line casserole dish with aluminum foil and drizzle lightly with olive oil
-Cut sausage into rounds and put into large bowl
-Dice onion finely and add to bowl
-Cut potatoes into 1/2" cubes and add to bowl
-Drizzle sausage mix with a few Tbsp of olive oil and season to taste with paprika and thyme. Toss to evenly distribute
-Bake in oven for 45 minutes to an hour, stirring every 15 minutes. Potatoes should be brown and tender
-Top with shredded cheese and bake an additional 5 minutes until cheese is melted

Sunday, August 17, 2014

Loaded Baked Potato Salad

Two years ago Jeff and I went to a friends' place for 4th of July, and they happened to have this magical potato salad from Costco that tasted like sunshine and rainbows. I think I ate my weight in potato salad that day.

I was dismayed to realize that since I do not have a Costco membership, I cannot acquire this potato salad on my own; luckily, I realized we live in a world with internet, so I used the Google to locate a copycat recipe! I actually now prefer to make this potato salad myself rather than try to make shifty deals with Costco members. I mean for the taste, not just because of the hassle and shiftiness of the other option.

I wasn't sure when, if ever, I might get to unveil my delicious potato salad discovery at a family event. I think there is a law of the universe that says every family must have that one member who is known as the Potato Salad Master, and he or she is the only one who may ever bring the potato salad. If I should dare to step on the toes of this sacred bearer of the family potato salad, I would be smoted. Unfortunately for me personally, I do not like the potato salad brought by my family's potato saint; I do not like onions and their salad to me tastes like onion salad with potatoes waved over it for effect.

Then I realized that this person is only on one side of my family, and we have plenty of gatherings on the other side, so I brought the potato salad, darn it! Make way for the new Potato Salad Master!


The pictures in the slideshow are of a batch I made for a family gathering with my in-laws earlier this summer. I'm trying to root myself in as the Potato Salad Master anywhere I can, and so far so good! For that batch, I got into a weird zone when chopping the potatoes and chopped them super tiny. I made this salad again yesterday and didn't go so nuts, and it was still awesome, so don't think you need to get neurotic with the chopping for it. Also, the original recipe includes green onions, and I admit that after having made the copy cat recipe without the green onions (because I don't like them) and trying the Costco again, now the original has too strong of an onion taste for me. As I mentioned before, I am pretty sensitive to onions in potato salad. I did meet the onion people part way by putting a teeny dash of onion powder into mine.

Another interesting fact about this potato salad: it is delicious on hot dogs. I admit I was tipsy when I first thought of this, but I have since tried it sober and it holds up. If you make this potato salad for a cookout and there are hot dogs around, try it. Bun and all.

A few notes about the ingredients I choose: I go anywhere between 2-3 lbs of potatoes, but keep the other measurements about the same. I also have started using that fully cooked bacon that comes in a box because it is at a perfect level of crispness without being charred or black. I use my Pampered Chef chopper (think Slap Chop) on it and get good little crumblies every time. I have used regular bacon though (as seen in the slideshow), but it was so much more of a pain because I couldn't get it cooked enough without it being burnt and sad, so my chopper didn't work and I had to try to chop itty bitty bacon pieces by hand. 

Original Copycat Recipe at No Ordinary Moments
Ingredients:
-3 lbs small red potatoes
-1/2 lb bacon
-1 1/2 cups sour cream
-1/2 cup mayonnaise
-1 tsp salt
-1/4 tsp black pepper
-1/8 tsp garlic powder
-1/8 tsp onion powder
-1 cup shredded cheddar cheese

Directions:
-Wash potatoes and chop into 1/4" chunks
-Put potatoes in pot and fill with cold water covering potatoes by 1". Bring to boil on stove top and boil for 5 minutes or until knife goes through center of chunks with no resistance. Drain in colander when finished
-While potatoes are cooking, cook and/or chop bacon
-In large mixing bowl, combine sour cream, mayonnaise, spices, and bacon
-Mix boiled potato chunks well into bowl mixture. Add shredded cheese and mix well
-Chill until ready to serve

Sunday, July 6, 2014

Chicken Bacon Wraps

I first got this recipe from Jessica, but it turns out it's a Paula Deen. Don't worry, there isn't any butter in it. Actually, there are only 4 ingredients and they're pretty easy to make.

Jeff and I have made them for dinner twice, but both of those times were because we were really hurting for meal ideas. These are delicious, but they're much more of an appetizer than a main course. I keep imagining that someday someone will invite us to a cookout or dinner party and I will think to myself, "I know just what to bring!" and somehow I will get these there, hot and delicious. I'm not sure at this point how I would do that without prepping them and then using a friend's oven, but maybe that's just how it would have to be. The down side of that plan is that they have to cook for 30-35 min, and I feel like that's outside the polite "may I use your oven?" guidelines.


As far as "dredging" the wraps in the powder mixture... I'm not entirely sure what dredging means? So I dipped each one in, then used a spoon to pack a decent amount of powder onto the wrap, lifted it out, gave it a little tap to shake off excess, then put it on the pan. I also used my trick from the black bean flautas for baking these. I covered a baking sheet in aluminum foil, then laid a cooling rack on top and placed the wraps on the cooling wrack so they could drip onto the foil. The recipe calls for a broiler pan for the same reason, but apparently my oven didn't come with one. I wouldn't recommend using thick cut bacon for this recipe. Or, if you must, don't cut your chicken pieces as small as the recipe says. The end result will be dry chicken and chewy bacon - trust me on that.

Original recipe from Paula Deen
Ingredients:
-4 Boneless Skinless Chicken Breasts
-1 lb Sliced Bacon
-2/3 Cup firmly packed Brown Sugar
-2 Tbsp Chili Powder

Directions:
-Preheat the oven to 350 degrees
-Cut the chicken breasts into 1" cubes. Cut the bacon slices into thirds
-Wrap each chicken piece with bacon and secure with a toothpick
-Combine brown sugar and chili powder in a small bowl
-Dredge wrapped chicken in mixture and place on broiler pan or cooling rack on a baking sheet
-Bake 30-35 min until bacon is crisp

Thursday, June 19, 2014

Lime Fish

So,

We started up the food blog again apparently. Tonight, Aly googled some lime fish recipe which was embarrassingly easy to make and we are gonna blog about it.

We left off a few of the ingredients because Aly didn’t like them, and she went shopping without me this week. So no red onion and no sesame seeds. I think the seeds would have been an improvement to an otherwise lame salad.

This meal was a dish and a side, which is kind of unusual for us, usually we do a meal and then forget about a side. The meal was the fish, and the side was a Snap Pea Salad. I’ll talk about the salad first. To make it you throw the olive oil and lime juice in a bowl. Then you are supposed to grate some ginger, but that’s a pain so I diced it. Throw that in, and then the peas. Mix and done. Overall they were alright, but didn't have a lot to them. Aly didn't like uncooked snap peas, but I didn't mind. Just nothing to write home about. Limey peas. I think I ate them all and she threw like 4 away. This is where the seeds may have added some excitement to the salad, but maybe not. We probably won't bother again, but if I see them in a salad bar I’m all over it.


The fish was the main dish. It was embarrassingly easy. Throw oil in the skillet. I didn't measure but used way more than called for. It wasn't enough and the fish stuck to the pan. As you can see from the pics, Aly's turned into a pile. We were supposed to use Halibut, but our Wegmans is weirdly stocked. We never have basic fish that isn't frozen, but always have tons of exotic 3 eyed puffer fish or other ridiculous stuff. We threw the fish in the oil and fried it 5 min on each side. Put it on a plate and served with lime slices. The recipe didn't mention what to do with them, so we squeezed them on the fish. Overall I forgot how easy and good fish like that is. We should probably do it a lot more often. We probably intend to do that again. 

-Jeff

Recipe from RealSimple.com
Ingredients:
-1 Tbsp Fresh lime juice
-1 tsp Grated fresh ginger
-2 Tbsp Olive oil
-Kosher salt and black pepper
-12 oz (4 cups) Sugar snap peas, strings removed
-1 Small red onion, thinly sliced
-1 Tbsp sesame seeds, toasted (optional)
-4 6oz Pieces halibut fillet
-1 Lime cut into wedges

Directions:
-In a large bowl combine the lime juice, ginger, 1 Tbsp of the oil, and 1/4 tsp each salt and pepper
-Add the snap peas, onion, and sesame seeds. Toss to coat
-Heat the remaining Tbsp of oil in a large nonstick skillet over medium high heat
-Season the fish with 1/2 tsp salt and 1/4 tsp pepper. Cook until opaque throughout, about 3-5 minutes on each side
-Serve with the salad and lime wedges

Saturday, June 7, 2014

Black Bean and Corn Flautas

I have made a push recently when planning our dinners to try some new recipes. Most of them have been a bust, but luckily we happened onto this one and felt that it was a keeper.

We are pretty big fans of Mexican food, so this one looked like a good one to try because it also looked like it wasn't too time consuming. The only issues I've had so far has been with the bake time and temp. The recipe instructs 425 degrees for 15 minutes. Both times that I have made these flautas, they have been very crispy and browned, even though I've tried a few different positions with the oven racks. I will have to keep playing with it until I get it right, and if I get it i'll update this entry to let you know.


The original recipe was a little confusing in parts to follow.She started instructing you to do something with peppers that she never said you needed, and the microwaving instructions become a little strange, so I have re-written it. However, if you want to access the original, it is here.

Ingredients:
·         -9 Corn tortillas
·         -1 cup Black beans
·         -1 cup Mexicorn (corn w/ red and green peppers)
·         -½ tsp Chili powder
·        - ½ tsp Garlic powder
·        - ½ tsp Cumin
·        - ¼ tsp Red pepper flakes
·        - 4-6 oz Shredded cheese
·         -2 heaping Tbsp Taco sauce
·         -Chicken-cooked or mostly cooked (optional)
·         -Olive Oil
 -Dips/toppings of choice (sour cream, salsa, Sriracha, etc)

Instructions:
·         -Heat oven to 425
·         -Line a baking tray with aluminum foil and lay a cooling rack on top. If you don't have a cooling rack, you can use a broiler pan
·         -In medium bowl, combine black beans, corn, chili powder, garlic powder, cumin, red pepper flakes, taco sauce, and chicken
·         -Pour a little bit of olive oil into a small bowl and shredded cheese into another bowl (will use later but want ready)
·         -Do this next step in small groups and fully prepare flautas from each group before starting next batch so they don't get cold. Wrap a few tortillas (about 4) in a damp paper towel followed by a dry paper towel and microwave on plate for 30 seconds
·         -Using a plate as prep space, rub a little olive oil on one side of a tortilla and fill with black bean mixture. Add shredded cheese. Roll up and secure with toothpick. Place on cooling rack on top of baking tray
·         -Repeat with all tortillas heated in this batch, then heat and fill next batch. Continue until all flautas are filled and ready to bake
-Bake on middle rack (not too close to top of oven) for 15 minutes. At the end of baking, set to broil for just under a minute to make tortillas crisp and golden

Saturday, March 15, 2014

Experiment Brownies

I was milling about the house with a little more than an hour before Jeff was supposed to be home, and the urge to bake something hit me. So I grabbed my Hershey's cookbook that I'd hardly ever used (though everything in it looks marvelous) and looked for something that only required ingredients I had in the house.
Instead I settled for some rocky road brownies that mostly used things I had (except marshmallows...) and I opted to use peanut butter chips in their place, because I did have those. I had a jar of tiny dried marshmallows that we throw on ice cream, so I added a bunch of those to the batter, but in the end they melted in and we couldn't detect them. I think the recipe is fine without them.


Of course the result was amazing, because it was brownies with peanut butter chips. We ate the first of them while they were still warm so the chocolate topping was still gooey. That was amazing, but they were also still wonderful after the topping had hardened. They stayed soft for a while, and I am attributing that to the hardened chocolate on top keeping all the goodness inside.

Recipe (mostly from Hershey's cookbook until you get to the peanut butter chips instead of marshmallows... plus you're supposed to put nuts in them)
Ingredients:
-1/2 Cup (1 stick) butter
1 Cup sugar
2 Eggs
1 tsp Vanilla extract
1/2 Cup all-purpose flour
1/3 Cup cocoa powder
1/2 tsp Baking powder
1/2 tsp Salt
1/2 cup semisweet chocolate chips (recipe calls for 1 cup)
1/2 cup peanut butter chips (not in original recipe)
1 1/4 cup mini marshmallows (I did not have these)
1/2 cup chopped nuts (I didn't use these either)

Directions:
-Heat oven to 350 degrees. Grease 9" square baking pan
-Stir together any baking chips, marshmallows, and/or nuts you are using and set aside. Place butter in microwave safe bowl. Microwave on Medium 1 to 1 1/2 minutes or until melted. Add sugar, eggs, and vanilla, beating with spoon until well blended. Add flour, cocoa, baking powder and salt; blend well. Spread batter in prepared pan
-Bake 22 minutes. Sprinkle chocolate chip mixture over top. Continue baking 5 minutes or until marshmallows have softened and puffed slightly. I think 5 minutes was too much for mine because my chips seemed a little scorched in some areas. I think 4 would have been plenty
-Remove from oven and use spatula or back of wooden spoon to spread/smear chip topping (if you didn't use marshmallows or nuts at all). Cool completely. Cut into squares with wet knife

Wednesday, January 29, 2014

Taco Puffs

I'm not really sure what else to call these. A coworker and I were sharing recipes and she said these are how she usually uses up leftover taco meat. Now, I know it sounds ridiculous to have leftover taco meat and want something that isn't just more tacos, but for me it happens because I run out of taco ingredients at different paces, and meat seems to always be last.

My instructions on these weren't incredibly specific, but they are very simple, so I managed and they were pretty tasty. Jeff said he would be fine for these as a regular means of using up excess taco meat, so I consider that a win. He also said "Plus they're a different shape, so I like them." So, there's that. No, I did not have more clarity on what they were a different shape than. Than tacos? Than each other? We will have to live our lives with this mystery.

Taco Puffs

The cheese residue that would get stuck on my hands when I reached into the bag tended to make it hard to pinch the crescent roll seams closed, but I just kept a paper towel handy and wiped the residue off between the cheese and pinch steps.

Recipe:
Ingredients:
-Taco Meat (If you don't have any already prepared, I'd make some with ground beef and taco seasoning. Follow the instructions on the seasoning, but I doubt you'll use all the meat)
-Shredded Mexican Cheese
-Crescent Rolls (I used 2 rolls and had 3 left from about 1/2 a pound of leftover meat)

Directions:
-If the meat is not already prepared, do that. Follow the instructions on the back of the seasoning packet.
-Preheat oven according to the crescent roll instructions (mine were 375)
-Unroll the dough and separate the rolls. Put a little spoonful on each at the widest area and top with a little pinch of cheese.
-Seal the roll by pinching edges together in any way you can. I got creative with some of mine and they were all kinds of goofy shapes. The important part is to seal all openings as best you can.
-Place the sealed puffs on a baking sheet and bake according to roll instructions (mine said 10-12 minutes and were done at the 10)

Sunday, January 12, 2014

Apple Goat Cheese Pizza

This is easily one of the most pretentious foods I've ever prepared. I first had it at a restaurant that my family liked to meet up at in Mt Airy. The place used to serve very awesome specialty pizzas along with other general bar food. Unfortunately, they changed their menu one day and got rid of all of the awesome stuff they served. We've gone back once since, but the menu is so sparse and bland now that it's not worth it and we probably won't go again.

This pizza was my favorite on the menu, and I would crave it and specifically go to this restaurant to get it. Once they stopped serving it, I decided that Jeff and I would have to try to make it ourselves.


We usually make the dough ourselves with a recipe Jeff found a while ago that we'd been using for homemade pizzas. This most recent time, though, we decided to buy a pre-made pizza crust to save time because the homemade dough has to rise for 2 hours. I definitely prefer the pizza with the homemade dough, but this may be because the only crust we could get was whole grain. I felt like this one tried to have too much of a presence as a taste and it challenged all of the toppings' flavors rather than melding with them.

Recipe:
Ingredients:
Dough (If making your own):
1 tsp Active dry yeast
1 Cup water
2.5 Cups flour
1 tsp Salt
Olive Oil

Toppings:
1 Granny smith apple, cored and cut into thin slices
2-3oz Goat cheese crumbles (I got a 4 oz tub and didn't use all of it)
2 Cups Shredded Mozzarella Cheese
Olive Oil

Directions:
- Prepare Dough: In medium bowl, mix yeast in water. Let sit 5-10 min.
- Combine Flour and Salt in a large bowl. Add yeast/water mixture.
- Remove dough from bowl, wipe it out smooth, then coat in oil. Let sit in bowl covered with paper towel 2 hours to rise.
- Preheat oven to 500. Shape dough into crust on top of pizza stone or baking sheet
- Brush with extra olive oil and place a layer of mozzarella cheese
- Top with apple slices and goat cheese crumbles
- Finish with another layer of mozzarella cheese and bake for 12-15 minutes

Sunday, December 29, 2013

Cake Balls

Haha, balls.

A former coworker of mine used to make cake balls for special occasions and every time she brought them in, it was like Christmas came early. They were so good, I even hired her to make a bunch for my sister's baby shower because the world had to know about the cake balls!

Every Christmas I make a gift basket for my in-laws that includes tasty treats and usually an ornament or two. [Here's a shameless plug for my craft blog where I show how to make my ornaments. Go to it!] Two years ago or so, my mother-in-law got me one of those cake pop pans you see on infomercials that are supposed to bake the cake in the ball shape to make cake pops super quick and easy. I thought I'd include some cake pops in their basket that year as a thank you. Well, those pans don't work. Even after following the suggested recipe changes to make denser cake pops, they're nearly impossible to dip in the candy coating, and you get a lot of melted candy with cake pieces in it, but very few cake pops. Even some that survived the dipping process didn't survive the hardening and fell off their sticks onto my counter. However, after starting with about 48 cake pops, I managed to salvage about 8 and included them in the gift basket. I never should have done that. They really enjoyed the cake pops that had survived, and were devastated to hear what a hassle it had been and that I would never bother with it again.

My mother-in-law even lent the pans to a friend who wanted to try (and I guess just assumed I was doing it wrong), and she had the same result. So, unfortunately for anyone who wanted really easy cake pops, those don't work, but the good news is I'm not as incompetent as people seem to think.

Since the cake pops were so popular, I decided this year to finally attempt to tackle the delicious cake balls that my coworker had made. I'd discussed it with her several times and had gotten a pretty good idea of the process, I just hadn't done it yet. So after much mental preparation, I finally dove in and made them this year. And they worked! I was so excited! Using one cake and one tub of frosting, I got about 63 cake balls, and I managed to dip and coat every single one! They were all keepers! I don't know if I've yet fully expressed my excitement. Seriously, it was like a Christmas miracle.


I would definitely recommend trying to bring out as few cake balls as possible at a time and not letting them sit too long before dipping, because there was an obvious difference in difficulty for coating cake balls that were still chilled versus cake balls that had begun to really thaw. Also, you can make these in just about every cake and frosting combination you can think of. I did double chocolate because those were always my favorite from my coworker and I knew it would be agreeable for the people I was giving them to, but she's also done strawberry cake and frosting, and even spice cake and cream cheese frosting; the possibilities are endless. I think next I'd like to do a combination of chocolate peanut butter, because that is delicious 100% of the time.

Recipe:
Ingredients:
1 box cake mix of choice (I did Pillsbury chocolate)
Ingredients required by cake mix
1 tub frosting of choice (I used Pillsbury milk chocolate)
2 bags candy melts in color of choice (I used "Bright White)
Sprinkles or embellishments of choice

Directions:
-Bake the cake according to the box instructions in a 9x13" pan (or however. You just need cake and the shape doesn't matter). Let the cake cool completely.
-In a large bowl, combine the cake and the entire tub of frosting. Mix together until well combined. I used my hand mixer and it worked well.
-Take small scoops of the cake/frosting mixture and roll it into small balls, about 1" around, maybe a smidge bigger. Place these on a cookie sheet lined with wax paper. Possibly multiple cookies sheets (again, I ended up with about 63 of them)
-Chill the cake balls in the freezer for at least an hour.
-Melt the two bags of candy melts according to package directions. Mine felt like they were taking forever to melt, but don't be tempted to turn the heat too high because if you overheat the candy melts, they'll lose their coating consistency and you can't get it back. I really can't stress how much better this process works with a double boiler than by the microwave method. I bought a double boiler just for the occasion.
-Sticking a toothpick into a cake ball, dip it into the coating and swirl it around to cover it completely. I also used a wooden spoon to help spread the coating, and to help remove excess so I didn't run out of coating.
-Quickly transfer your coated cake ball back to a cookie sheet covered in wax paper and add any sprinkles or embellishments before the coating cools too much for it to stick. I tended to use my wooden spoon to cover the hole left in the top from where the toothpick had been. I also sometimes used a plastic fork with the center two tines removed to help get cake balls off of the toothpick.
-Let the coating harden completely (only a few minutes). It compresses when it hardens, so some of them cracked, but not so much that they were unpresentable, and some of mine started compressing cake out of little holes in the coating, which looked weird. I just removed the squirted cake and they were fine.

Sunday, December 1, 2013

Caramel Apple Cheesecake Bars

My mom asked me this year what I'd bring to Thanksgiving. My response was "I don't know, what do you need that I can make?"
My family's Thanksgiving spread is pretty traditional year to year (as I imagine many families are) so this question was necessary because I have never made any of the dishes that go with our dinner. I've helped my mom for years, but never to a degree that I felt I could wholly take on any of them with confidence.
We decided that I should bring a dessert, because our dessert table is much more flexible that day than the dinner table.

I decided to make these caramel apple cheesecake bars that I'd made once before and thought I remembered enjoying.

I hate me sometimes.

Yes, these bars are delicious beyond all reason or explanation, HOWEVER, I felt like I was in the kitchen for freaking ever. It might have just been that I was getting anxious about how long they were taking that made them seem to take even longer, but whatever the reason, these really felt like they took too long. Luckily, they were amazing, so it was worth it. Seriously, both my brother and my brother-in-law stopped me separately to make sure I knew how good they were.


Before you get into the ingredients and think I'm crazy, I should tell you that this is originally a Paula Dean recipe, so that's why there's so much butter. Also, I hated chopping all of the apples into tiny bits because it was just so tedious, but once I mixed the cinnamon mixture into the bowl of cut up apples, I forgave them for being obnoxious to cut because they smelled soooooo good.

Oh, and thank you to whatever recipe I'd made since we moved to the new house that required oats, because I forgot to get them when I was getting these ingredients, and I was SO thankful that I didn't have to go to the grocery store that day for them.

Recipe:
Ingredients:
2 Cups Flour
1/2 Cup firmly packed Brown Sugar
2 sticks Butter, softened
2 8oz packages of Cream Cheese, softened
1/2 Cup sugar + 2 Tbsp Sugar, divided
2 Eggs
1 tsp Vanilla
3 Granny Smith Apples, peeled, cored, and finely chopped
1/2 tsp Ground Cinnamon
1/4 tsp Ground Nutmeg
1/2 Cup Caramel Topping

Streusel Topping:
1 Cup firmly packed Brown Sugar
1 Cup Flour
1/2 Cup Quick Cooking Oats
1 stick butter, softened

Directions:
-Preheat oven to 350
-In medium bowl, combine flour and brown sugar. Cut in butter with forks until mixture is crumbly. Press evenly into 13" x 9" pan lined with aluminum foil. Bake 15 min or until lightly browned.
-In large bowl, beat cream cheese with 1/2 cup sugar until smooth. Add eggs, 1 at a time, and vanilla. Stir to combine. Pour over warm crust.
-In small bowl, stir together chopped apples, remaining 2 Tbsp sugar, cinnamon, and nutmeg. Spoon evenly over cream cheese mixture.
-In small bowl, combine streusel ingredients and mix well. Sprinkle evenly over apple mixture in pan. Bake 30 minutes until filling is set. Drizzle with warm caramel topping.

I chilled mine in the fridge for a bit once we got to my mom's because it felt like they were going to ooze everywhere if we'd cut into them without it. It might be that they needed more time in the oven, but that wasn't happening.

Thursday, October 31, 2013

Cream Filled Pumpkin Cupcakes

I've made these for my team at work for the past two years and they're becoming both famous and infamous. Everyone is excited to see them, but then they are mad at me because they smell and taste so good that they are tempted all day to eat nothing but cupcakes.

I had originally planned to make them in one night, but I was ahead of schedule on my to-do list for the week (Jeff and I are hosting a Halloween Party tomorrow so my to-do list was quite involved), so I made the cupcakes themselves one night and did the filling the next day. I would recommend doing it this way every time because I had forgotten how long the filling takes.

For the filling, you have to bring the milk and cornstarch to a boil, then remove them from the heat and let them come to room temperature. If you're making them all at once, I would definitely recommend doing this step while the cupcakes are baking, because you can use the rest of the bake time along with cupcake cooling time to wait for this stuff to come back down to room temp. I passed the time by practicing doing my hair for my Halloween costume this year (Rosie the Riveter). The hair didn't go so well, but by the time I gave up, the mixture had cooled, so I suppose it all worked out.


After having made the pumpkin whoopie pies this year and having loved that filling so much, I might go nuts next year and use that filling instead of this one. It would definitely make the cupcakes a heavier treat, but that spiced filling was just SO good. Also, the smell of boiled milk and cornstarch is gross, so I've always personally struggled a little with these cupcakes since I started making them myself because that's all I think of when I try to eat them.

Also, this year instead of spooning the filling into the cupcakes, I put it in a ziploc bag with the corner snipped off and piped it in, and this is definitely the way to go. I didn't even use a fancy pastry bag tip, but the speed and precision from the bag just blows the spoon method out of the water.

The original recipe suggests putting a clove stem in the top of the little "hats" (as I call them) once you place them back on top, but I have never done this because while it is cute, it means I have to buy clove stems so everyone can take them off their cupcakes and throw them away.


Recipe (Originally from Taste of Home)
Cupcakes
2 Cups Sugar
3/4 Cup Canola Oil
1 15oz Can Solid-Pack Pumpkin
4 Eggs
2 Cups Flour
2 Tsp Baking Soda
1 Tsp Salt
1 Tsp Baking Powder
1 Tsp Ground Cinnamon

Filling:
1 Tbsp Cornstarch
1 Cup Milk
1/2 Cup Shortening
1/4 Cup Butter, softened
2 Cups Confectioner's Sugar
1/2 Tsp Vanilla Extract

Directions:
-Preheat oven to 350. In a large bowl, beat sugar, oil, pumpkin, and eggs until well blended. In a separate bowl, combine Flour, Baking Soda, Salt, Baking Powder, and Cinnamon. Gradually add to Pumpkin mixture until well blended.

-Fill paper-lined muffin cups 2/3 full. Bake 18-22 minutes or until a toothpick inserted in center comes out clean. Cool 10 minutes before removing from pans to wire racks to cool.

-For Filling, combine cornstarch and milk in a small saucepan until smooth. Bring to a boil, stirring constantly. Remove from heat; cool to room temperature.

-In a large bowl, cream Shortening, Butter, and Confectioner's Sugar until light and fluffy. Beat in Vanilla. Gradually add cornstarch mixture, beating until smooth.

-Using a sharp knife, cut a 1 inch circle 1 inch deep in the top of each cupcake (I tend to cut a cone shape). Carefully remove tops and set aside. Spoon or pipe filling into cupcakes. Replace tops.

Wednesday, October 23, 2013

Taco Salad

For the first several years of my life (well into high school) I was not able to eat lettuce.
No, wait, let me be more specific: I was physically capable of eating lettuce, but the act of doing so filled me with an unmatchable disgust. I was able to detect the tiniest speck of lettuce in my food, and I had the immediate reaction of spitting out the entire bite onto my plate. My parents thought this was gross and awful, but it was how it was.

Sometime during my senior year of high school, I decided to try to lose weight and eat healthier. I knew that my meal choices were limited unless I decided to get over this thing with lettuce, because it's super easy to make or order a salad (though I know several restaurants have managed to make them unhealthy, but that's a different matter). Right around when I first made this decision, my sister brought this taco salad to a family gathering. I tried it, and I loved it immediately. It was my gateway salad and thanks to it, I am able to eat some green leafy things (though not many... let's not go nuts here).

Sometimes at restaurants I will see salads on the menu that are similar to this one, and every time I order one, I am stunned when the server asks me what kind of dressing I'd like. There is a solid moment every time in which I stare at them with a completely confused look on my face and don't say anything, then ask them what they have, and choose something that sounds vinaigrette-y, but request it on the side. When the salad comes, I just remove the dressing cup and ignore it completely.
With the salsa and sour cream mixing together in this salad, you really don't need a dressing. It's delicious just how it is.


You can make this salad in varying levels of "completeness" depending on where you are eating it and how much you think will be gone in a sitting. If you are taking it to an event and expect it all to be eaten, mix everything together really well in a bowl and leave it for guests to help themselves.
However, if you're making it at home or expect there will be leftovers, only mix the romaine, beans, and corn into the salad bowl. After that, serve the other mix ins separately and allow each person to make their own. The salad can't be kept once the salsa is mixed in with it, and the chips just get pretty gross after sitting in it for a while.


Ingredients: (they're approximate because I usually just make my own personal bowl, so feel free to play around with it until you like what you have)
-Head of Romaine Lettuce (or bag if you don't feel like cutting it up)
-Can of Black Beans
-Can of Corn
-Tortilla Chips
-1/2 jar Salsa
-8 oz Sour Cream
-Shredded Mexican Cheese
-Optional: Cook some chicken or steak with taco seasoning to put on top

Directions:
1) If adding meat, prepare as desired. I usually cut up chicken breasts into cubes then cook them with taco seasoning.
2) Rinse and chop romaine and put in salad bowl
3) Drain cans of beans and corn, then add to salad bowl and mix well
 - here's where you stop and put everything on the table buffet style if you want to keep any -
4) Crumble tortilla chips into bowl
5) Add salsa and sour cream, then top with cheese
6) Mix well and enjoy

Monday, October 21, 2013

Pumpkin Whoopie Pies

I have a difficult relationship with Fall related foods. I like them, but I get furious that I start hearing about them so early in the year; if it's still an average of 80 degrees or more, Starbucks should hold off on the Pumpkin Spice Lattes. However, once the temperatures drop a little, I'm excited to partake of seasonal delicacies with gusto.

Typically to celebrate the season I will bake my cream filled pumpkin cupcakes (which I still expect to do this year, so there's an entry to look forward to), but for my sister's Halloween party she requested that I make Pumpkin Whoopie Pies.
Last Christmas I received a whoopie pie pan, so I thought I'd test that while I made them. Unfortunately, I've never made any other whoopie pies, so I have no point of comparison. But let's not let that stop me from talking about the pan method anyway:

1) The instructions on the pan say  to "fill the cavities 2/3 full." Have you seen a whoopie pie pan? Those cavities are about 1/8" deep. I challenge anyone here to pour in just enough batter to reach 2/3 full.

2) They're not kidding about the 2/3 full thing.

The recipe was supposed to make 15 whoopie pies, but apparently I overfilled my pan, so I only ended up with 12. Actually, that was kind of convenient for me because the pan makes 12 at a time, so I just filled it twice.


I tried not to put too much of the Marshmallow Spice Filling on the pies because I remember it going EVERYWHERE the last time I ate one, but I definitely didn't put enough. I did, however, have a giant bowl of the filling left over, so Jeff and I just starting eating it with spoons. It's astoundingly delicious and I need to find something else to do with it. Maybe just a fruit dip.

I'll let you know how that turns out if I ever try it.

Recipe here

Thursday, October 10, 2013

Sweet & Sour Chicken

As previously mentioned, a lot of my renewed inspiration to start this blog back up was from Jessica of Crash Bang Kitchen. This recipe is one that I got from her blog (though it's originally from the food blog Made it, Ate it, Loved it). She brought it in to work one day and after sampling just a little bit of the sauce, I knew I wanted the recipe.

For authenticity, I referenced the original recipe while I made this. I will admit, it felt like it skipped a few important notes. For example, it never told me to preheat the oven. Obviously, if I read the recipe before diving in, I should be able to figure that out, but I just prefer a recipe that really lays it all out for you and makes it plain as day. This is also how I ended up with little chicken nubbins covered in cornstarch and egg goop waiting for the oil in my skillet to get hot. However, despite these little hiccups, it all still turned out.

Jessica had mentioned earlier that if I happened to have extra leftovers of this recipe and wanted to bring them in to work to share, she would be happy to help me prevent them from going to waste. So, with that in mind, I made a little more chicken than the recipe called for. I also used chicken breast tenderloins rather than chicken breasts, so the amount was difficult to judge, but the meat was pretty much the same once it was cut into pieces. Since I had more chicken, I also doubled the sauce recipe because Jeff and I agreed that we'd both rather have more sauce than not enough.

While I was making the chicken bits, Jeff set our new fancy steamer to work on some rice and broccoli. I definitely liked having the rice with this meal because it feels more like I ordered Chinese delivery. The broccoli will be a work in progress in the steamer. It was... less than desirable (unless you like broccoli that you don't have to chew).


Overall, I think this recipe was a big success and I would definitely make it again. Perhaps next time, to really seal that Chinese takeout feeling, I'll sprinkle it with sesame seeds when I flip the chicken.

Original recipe here

Wednesday, October 9, 2013

New Life

So, this blog got off track and was generally left to wither and die because we got lazy and stopped making new meals, and therefore ran out of entry material.
However, several things have changed since the last entry that lead up to a perfect time to resurrect this poor old thing. Some of these things include:

1) Jeff and I have moved into our first house and it is closer to our jobs, so we have more time in the evenings and are therefore trying new meals again rather than coming home and being so exhausted that we cook eggs and go to bed immediately every night.

2) Jeff's brother has moved in with us and we feel obligated to make food that isn't so lame or repetitive as we let ourselves get away with when it's just the two of us.

3) My friend Jessica from the blog "Crash Bang Kitchen" (see new link at right of page) has been inspiring me and making me want to get back into this food... blog... thing.

The major change from here is that Jeff will probably participate less in the entries if he participates at all. I may cover some meals he makes (by hovering obnoxiously over him taking pictures and asking him how it's going) and post in his place. Therefore, the baking entries will probably become more regular, because that's most of what I do.

Happy relaunch!

Monday, August 13, 2012

Breakfast Feature: Magic Sausage Rolls

Don't laugh because I said "magic sausage." If you're laughing, you can't eat them, and that means you have to deal with your brutal hangover.
Yes, that is why they are magic; these breakfast rolls are the ultimate hangover relief food. They're composed of Jimmy Dean sausage, a brick of Philadelphia cream cheese, and a roll of Pillsbury Flaky Layers biscuits. The exact ingredients are important for these, so I don't bother with generic versions.
I like to get as far along in the preparation as possible the day before so the next morning when I'm glaring at my kitchen out of one bloodshot eye, I don't have to tackle a lot of prep. This usually includes browning the sausage and mixing it with the cream cheese, but this time I took it a step further an prepped the biscuits, too. It's crucial to get the Flaky Layers biscuits, because you need to peel each biscuit into 3 pieces, which isn't too hard if they're already flaky layers.


Several people that I've made these rolls for have been hesitant because of the sausage cream cheese mixture, but these are the only food that I make that has NO leftovers EVERY time; I think that says it all.

Recipe:
Ingredients:
1 roll Jimmy Dean Sausage (I prefer Maple flavor)
8oz Philadelphia cream cheese
1 roll Pillsbury Flaky Layer Grands Biscuits

Directions:
1) Brown the sausage and drain it very thoroughly (I put it on a layer of several paper towels and dab it to get it as drained as I can)
2) After the sausage cools, mix it with the brick of cream cheese
3) Peel each biscuit into 3 pieces to get a total of 24 thinner biscuits
4) Spoon the sausage mixture into the biscuits and pinch them closed so it looks like a little taco
5) Put in a baking dish and bake at 375 for about 30 minutes until the biscuits are brown

Baking Feature: Peach Pies


My sister and I took my nephew to Baugher’s farm/orchard in Westminster, MD where we picked our own peaches. I love the smell and taste of peaches and Jeff spent several years living in Georgia, so he has some fondness for them, as well. We don’t get them often even when we are in a big fruit kick because I do not like eating the fuzz and I don’t take the time to cut them up, and I guess Jeff just doesn’t think of it? I’m not sure why he doesn’t get them.
Whatever the reason, I got some while we were at the orchard and I needed to use them. I decided to make a peach pie, which would officially be the first pie I’ve ever made. I’ve heard stories from several people saying that making a pie crust is a pain and often doesn’t turn out, so I decided for my first pie to just buy a Pillsbury one and call it good. For the rest of the pie, I used a Crisco recipe out of a cookbook my sister had.
The book had a pie crust recipe in it that you were supposed to use, and it specified to skip baking the crust for any time before the pie is fully assembled, so I assumed that would be the same for my pie. It was not the same for my pie.
The Pillsbury crust definitely needed to bake a little as when I removed the pie from the oven, the filling was over baked and the crust was under baked. Harrumph.
We ended up throwing most of that pie away (though it looked SUPER cute with the little crust cutout shapes on it).
I was very upset at my complete failure at pie and was determined to try again, so Jeff and I returned to the orchard and got more peaches for take 2. Conveniently, the orchard had little recipe slips for a peach crumb pie, so I thought I’d try this one instead because they are really well known for all of their awesome baked goods.
Rather than a traditional crust, this one calls for a crumb mixture that you press into the pan to make a crust, and sprinkle on top of the filling for a topping. I liked this crumb mixture, but after eating some pie, I think it was too bland and I would take out some flour and add brown sugar to it. Also, when they say to butter the pan, they aren’t messing around; my pie doesn’t come out of the pan despite the buttering I gave it. It’s more of a peach cobbler crumble by the time you wrestle it onto a plate.
Overall, this pie turned out better than the first one, but it still isn’t very good. I’m starting to think that the main problem may be that I don’t actually like peach pie…


Immediately after taking a bite of the second pie, Jeff said “you should make it with blueberries.” I think I agree; the crumb part seems like it will work well with blueberries, but I would definitely sweeten it for that. I also think I would try the blueberry with the original pie recipe (with the Crisco crust) because I like the crumb topping on that one more. Perhaps there is a blueberry pie entry on the horizon…

Friday, July 27, 2012

Lefty's Chicken

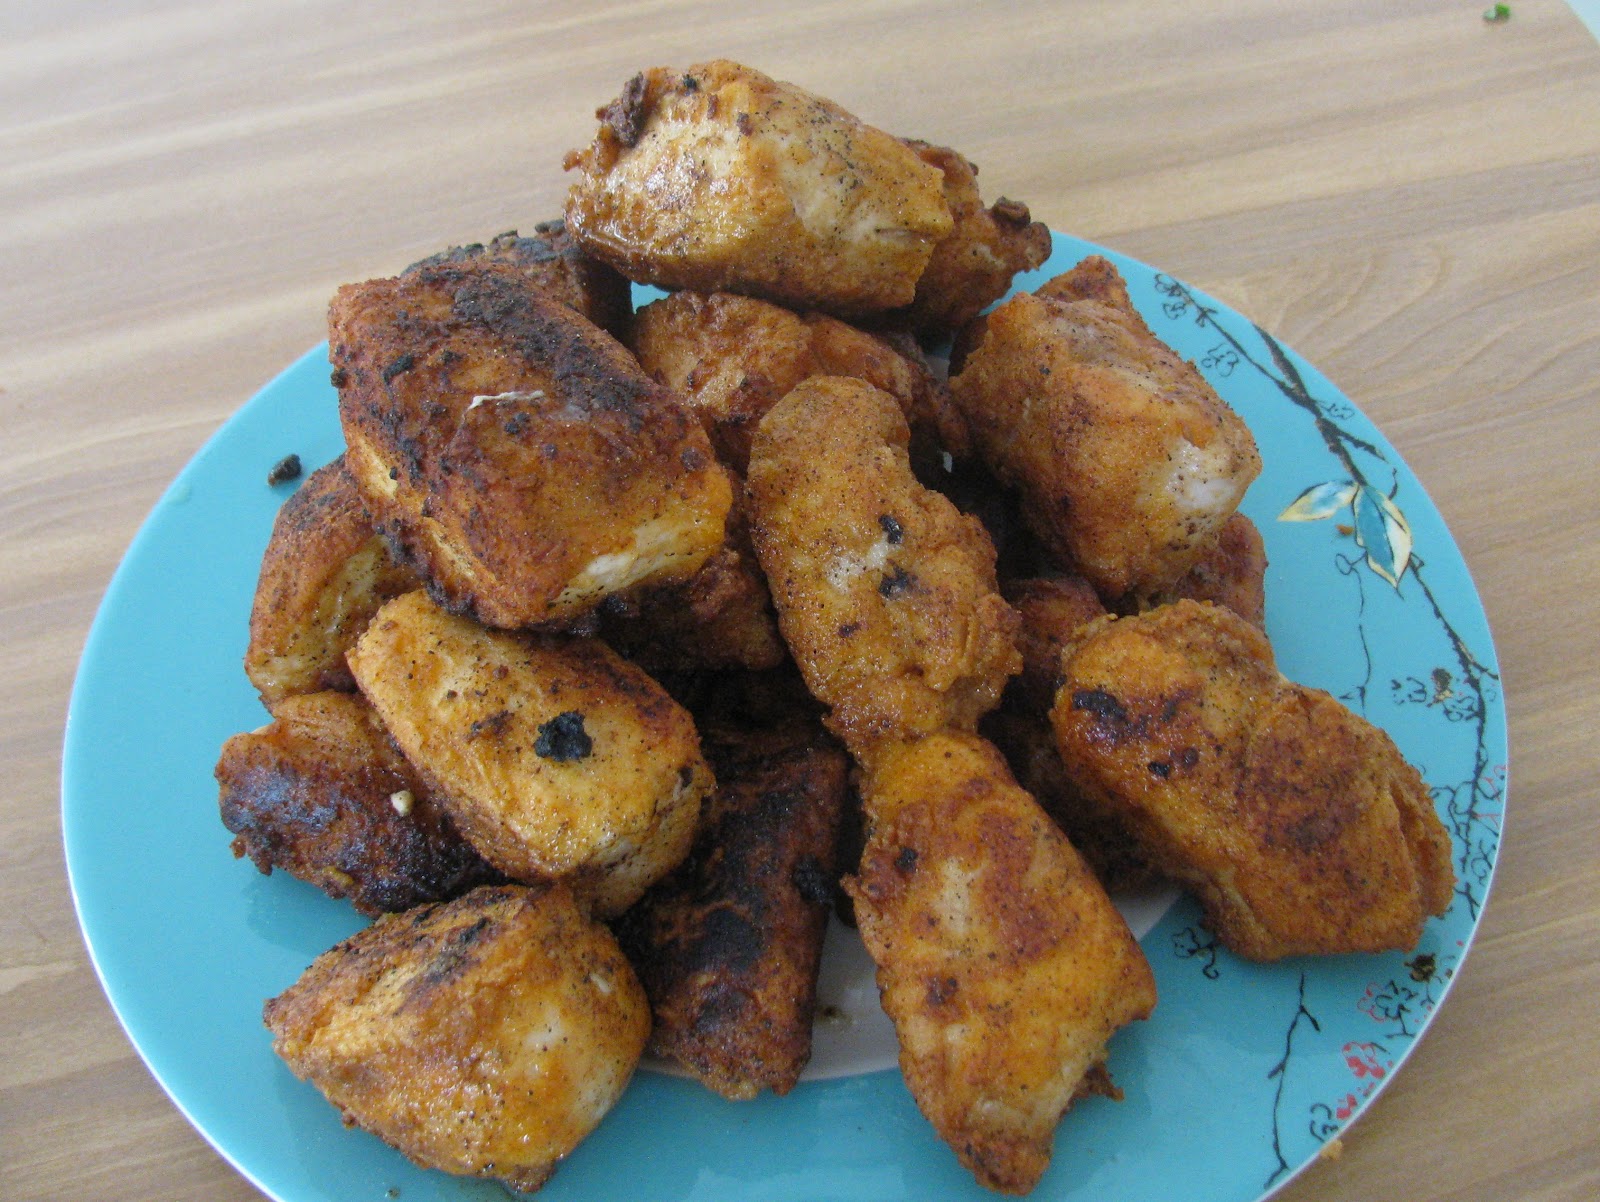
I was grocery shopping a few days back, and saw a package of Lefty's chicken and fish mix on the shelf. For whatever reason I grabbed it, thinking "Fried chicken might be fun".  http://www.amazon.com/Leftys-Fish-n-Chicken-Mix/dp/B003ETO4E2

We don't own a deep fryer, but I had some thoughts to get around that. I basically followed the recipe instructions on the back, except where they mentioned a deep fryer.

I used some chicken breasts and thighs we had, cut into chicken nugget sizes, and it worked really well. I mixed a cup of lefty's and two cups of water into a bowl. Then I dunked each nugget in and coated it. Then I coated it in a loaf pan filled with dry lefty's mix. Then I dumped the remainder of our vegetable oil into a big frying pan and cranked the temp to max. Dropped each one in, and fairly quickly the down side would brown. Flip them over, and let that side brown. Then they are done. It took a bit of eyeballing when they were done, and the first few were darker than I wanted.


They turned out great, and I will definitively buy this again. I'll get some pics up later. I didn't think to take any during the in-between steps, but I got some finished product.

Warning, the oil will splatter up and burn you. It's the price you pay.

Saturday, July 14, 2012

Baking Feature: S'mores Cupcakes Mk II

A coworker requested S'mores cupcakes for her birthday, but we decided to change up the recipe this time. We kept the graham crust, but this time I made chocolate cupcakes and then whipped up a marshmallow buttercream icing (which she'd used a few weeks before and told me about).

First of all, the chocolate cake was outstanding. It was Betty Crocker's Triple Fudge box mix, and it is my new favorite chocolate cake mix ever. I was eating it out of the mixing bowl with a spoon after I topped all the crusts I'd made.

The Marshmallow buttercream was a Rachael Ray recipe and I definitely changed it because this recipe made me gag a little when I read it. It calls for 4 full sticks of butter, some powdered sugar, some marshmallow fluff, and so little vanilla that it's silly that it's even mentioned (but I put it in anyway). I cut the recipe down by a stick of butter and used a total of three 7oz jars of marshmallow fluff (the recipe having called for one 16oz tub... but my grocery store doesn't sell tubs that big).


I also used my new super decorator to pipe the frosting onto the cupcakes, and it was really fun to use. They were a pretty big hit and I didn't have any trouble getting rid of them. Actually I needed to hide one to bring it home to Jeff.

-Aly

Recipe

Ingredients:
1 1/2 cups graham cracker crumbs
1/4 cup granulated sugar
5 Tbsp butter
Chocolate cake mix (and ingredients needed by box)
3 sticks of butter (room temp)
2 cups confectioner's sugar
1/2 tsp vanilla extract
3 7oz tubs of marshmallow fluff

Preheat oven to 350
Line muffin pans with paper liners
Mix graham cracker crumbs, granulated sugar, and butter in a bowl
Spoon into paper liners and pack down to make crusts
Bake crusts for 5 minutes
Make cake batter according to instructions
Pour into liners on top of crusts and bake according to directions
Beat butter for icing in a large bowl until creamy
Beat in one-forth of confectioner sugar until fluffy; repeat with remaining sugar
Beat in the vanilla, then stir in the marshmallow fluff until well blended
Frost cupcakes

Tuesday, July 10, 2012

FLOTUS Cookies

I was reading an article a week ago that was super pissed about a cookie recipe exchange/contest between Michelle O and Anne Romney. I thought it was a neat way to sort of "put politics aside" and just make some cookies, but apparently its demeaning for Big O's wife to make cookies because she is too important for that. Its an extremely liberal blog, so I doubt they cared if Anne wastes her time. They didn't seem outraged about that. Long story short, I failed to see the outrage, but I did get hungry. So I went home and made cookies.

Anne's recipe was for M&M cookies, which is neat but also kind of lame. Michelle went with a white/dark chocolate chip (you see what she did there?) and that sounded neat so I went to emulate that. We didn't have dark chocolate, so I went with milk.

I didn't think to go with whatever recipe Michelle posted, and instead googled one of my own and then changed a bunch based off feel (Aly hates when I do this, but she wasn't home yet). It was delicious. Aly had some left at her "Girls Night" and everyone complimented her on them.
No pictures for you because I always forget to take them, and they are blurry anyway. Aly typically takes them.

Ingredients

  • 3/4 Cup Sugar
  • 3/4 Cup Brown Sugar (we only had light, but Aly tells me there is also a dark kind)
  • 2 Eggs
  • 2 3/4 Cups Flour (I skimped here and went closer to 2 1/4.)
  • 1 Teaspoon Vanilla Extract
  • 1 Cup Butter
  • 1 Teaspoon Baking Soda
  • 1 Cup of Milk Chocolate Chips (plus some to finish the bag off)
  • 1 Cup of White Chocolate Chips (ish)
Directions
  1. Preheat Oven to 350. 
  2. Mix sugar, and eggs until creamy
  3. Melt butter (says to use a stovetop but I used a microwave) and add to mix along with vanilla
  4. Mix in flour and baking soda 
  5. It will be impossible to stir. Do it anyway. 
  6. Add in chips
  7. Grease cookie sheet.
  8. Drop teaspoon fulls onto the sheet
  9. Bake for 7 Min
I had to bake ours forever (more like 15 min), but it may be because I didn't follow the teaspoon sized dollops rule instead going with tennis ball sized balls I eyeballed with my hand and a wooden spoon. The important thing is it fit on one cookie sheet. Bad thing was most of them merged together and were weird shapes.

In the end they were amazing, super soft and really worth doing again.

* Four seconds of googling found her recipe. http://www.buzzfeed.com/zekejmiller/ann-romney-and-michelle-obama-face-off-in-presiden
**I do not know why some of the lines are white. Maybe Aly will fix them.